Creating a procedurally generated universe, one algorithm at a time.

Porting to Directx 11 - A Code Odyssey

Posted on Nov 4, 2012

Well its finally done. Junkship and the MGDF framework has been fully ported from DirectX 9 to DirectX 11, and while it wasn’t something that I can say I particularly enjoyed at times – I can see in hindsight that the pain endured was worthwhile. Along the way I learnt a whole lot and recorded a number of the issues I encountered, which I will outline here for the benefit of any other wary travellers who are considering going down the same path.

First things first, DirectX 11 is VERY different to DirectX 9. I skipped the whole DirectX 10 thing, so I can’t say for certain but it looks that for the most part, porting from DX10 to DX11 is relatively trivial as most of the API’s are the same (just with all the 10’s changed to 11’s). Unfortunately this is not the case with DX9 to DX11 (and so too with DX9 to DX10) – Almost every API is different, and there isn’t always a clear upgrade path for certain DX9 features. In addition, DX11 is almost universally more verbose than DX9, but in exchange you get much more flexibility. DX9 is very restrictive in certain areas, mostly due to its support for the old fixed function pipeline, and in DX11 these restrictions are gone in favor of having to write more boilerplate.

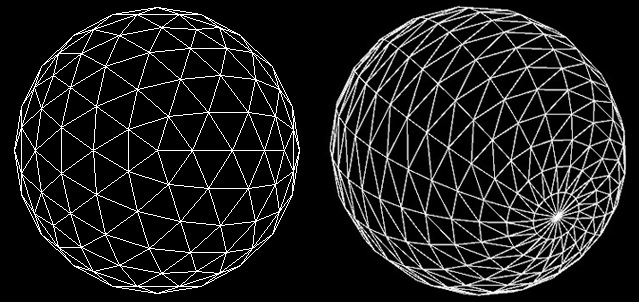
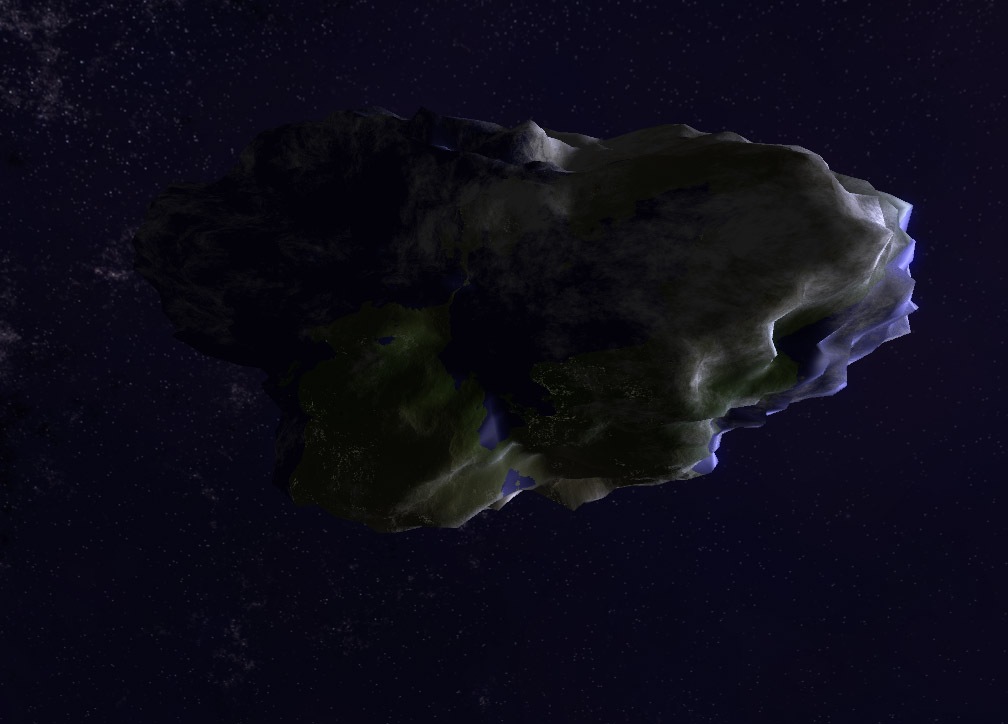
Domain shaders and Tessellation are awesome

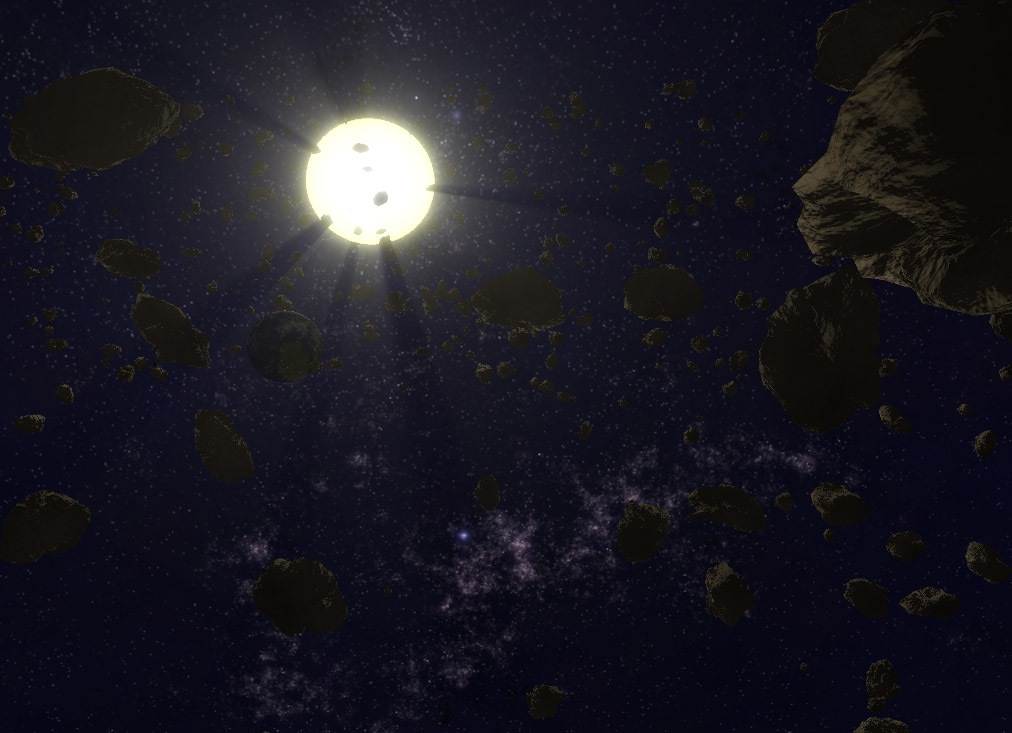
Ok, technically this has nothing to do with porting, but its cool so I’m going to include it. I implemented displacement mapping (bump mapping is just faking it… displacement mapping is the real deal) for the asteroid rendering in Junkship using the new tessellation features in DX11. To see the difference displacement mapping makes to the asteroid geometry compare the screenshot on the left (enabled) with the right (disabled) (though it does bring less capable GPU’s to their knees)

image

Sane initialization and feature support

One of the main problems with DX9 is that there was no clear minimum feature set required by hardware, this meant you had to laboriously check for support for pretty much every specific feature of the API you wanted to use. With DX10, this is no longer an issue as there is a clearly defined minimum feature set. In DX11 the ability to target a number of different feature levels has been added, so If you have a DX9 game and you are worried about using DX11 because you will leave users with old machines out in the cold – Don’t worry, you can use the DX11 API but specify that you want to support DX9 hardware (The table of feature levels and the minimum requirements are listed here)

In addition, the code for initializing DirectX and managing transitions from windowed to fullscreen mode has been improved. You no longer have to worry about resizing the window rectangle explicitly (Though you will still have to deal with resizing the back buffer)

No more lost devices (Great for GPU generated procedural resources)

In DX11 you no longer have to worry about the device getting lost. This means that you no longer have to regenerate resources from the D3DPOOL_DEFAULT (In fact the notion of putting resources in a DEFAULT or MANAGED pool no longer exists) every time the window is resized, or the user presses alt-tab. This is particularly important for Junkship as I generate large amounts of textures procedurally on the GPU, so in DX9 these resources had to be D3DPOOL_DEFAULT which meant that to prevent having to regenerate the resources every time the device became lost I had to copy each generated resource into a D3DPOOL_MANAGED resource. The problem is is that copying back to the managed pool in DX9 is very slow at the best of times, and ridiculously slow at the worst as GPU’s usually batch instructions and run independently of whatever the CPU is up to, so trying to copy a resource from the GPU before it has finished generating causes a pipeline stall which kills performance. The tricky thing is that you can’t be sure on the CPU side when the GPU has finished, so you have to make a best guess and wait and hope that you don’t stall the pipeline when you try to copy. Not having to do this pointless copying DOUBLED the speed of Junkship’s procedural texture generation.

Multithreading friendly

DX9 by default isn’t thread safe, and enabling multithreading support wasn’t recommended as the performance suffered considerably, luckily DX11 is considerably more multithreading friendly. Instead of executing instructions using the d3d device like in DX9, in DX11 you can construct any number of device contexts which can batch up commands on different threads and submit them to the GPU separately (the commands are still serialized on the GPU side, but this is largely transparent to the API user). Another nice feature is that you can run D3D on a thread other than the main window thread (nice if you want to have a separate render thread from the input poll loop or simulation thread) which wasn’t possible in DX9.

D3D Debug mode is useful and not a global setting

In DX9, there’s a switch in the DirectX control panel to enable D3D debug mode, which unfortunately applies to every D3D application on your system. Unfortunately I would regularly forget to switch it back to retail mode and would wonder why games I was playing would perform poorly or have strange graphical issues. In fact during one period in which I was addicted to Galactic civilizations 2 the in game minimap started appearing blank. Amazingly I put up with this for months until one day I noticed that D3D was running in debug mode. Returning it to retail mode fixed the issue </facepalm>. DX11 has a much more sane approach of letting you define whether debug mode is enabled for specific applications. Also from my experience the debug messages in DX11 seem to be much easier to follow than their more cryptic DX9 counterparts.

D3DX is dead, so is the D3DX effects framework – Don’t use them

The venerable D3DX library has been officially deprecated in Windows 8, and so while they are still available for use with DX11, I wouldn’t recommend it. There are decent alternatives for most of the functionality provided in D3DX in the DirectXTex and DirectXTK libraries, and all the math related functionality in D3DX now exist in the built in xnamath (if you’re using the DirectX SDK) or directX math (Which is just a renamed version of xnamath if you’re using the Win8 SDK) libraries. In addition the effects framework is no longer a core part of D3DX and is instead supplied as a separate source code library, however once again I wouldn’t recommend using it. There are three main reasons, firstly is that D3DX style .fx files are now deprecated by the HLSL compiler, secondly the D3DX effects framework makes use of shader reflection and run time compilation which is verboten if you want to write a metro style game, and thirdly – its just not that good. With a little work you should be able to write an effects system that is more tailored to your games needs and is also more flexible. I wrote my own effects management system and now I get all sorts of nice benefits like altering shaders while the program is running and seeing the rendering change accordingly – I might write some more about this in future if I get time.

Compile your shaders offline

If you weren’t already, compile your shaders offline using the FXC compiler supplied in the SDK (the flags etc. for making it work can be found here). Going forward runtime shader compilation will not be supported for Windows 8 Metro applications and should only ever be done for debug builds on your dev machine. I prefer to precompile my shaders even when developing as it lets me know instantly if my shaders are valid without having to boot up the game. To do this I wrote a small program that runs as a post build step which resolves all shader last modified times + the last modified times of any #imported shader fragments invokes FXC on them (I found this easier than configuring custom build tasks for the hlsl files in visual studio as it provides a centralized place to setup what flags etc. I want to compile with and to apply any custom processing required as a part of my effects framework). This is something that I might post up to GitHub in the future once I tidy it up.

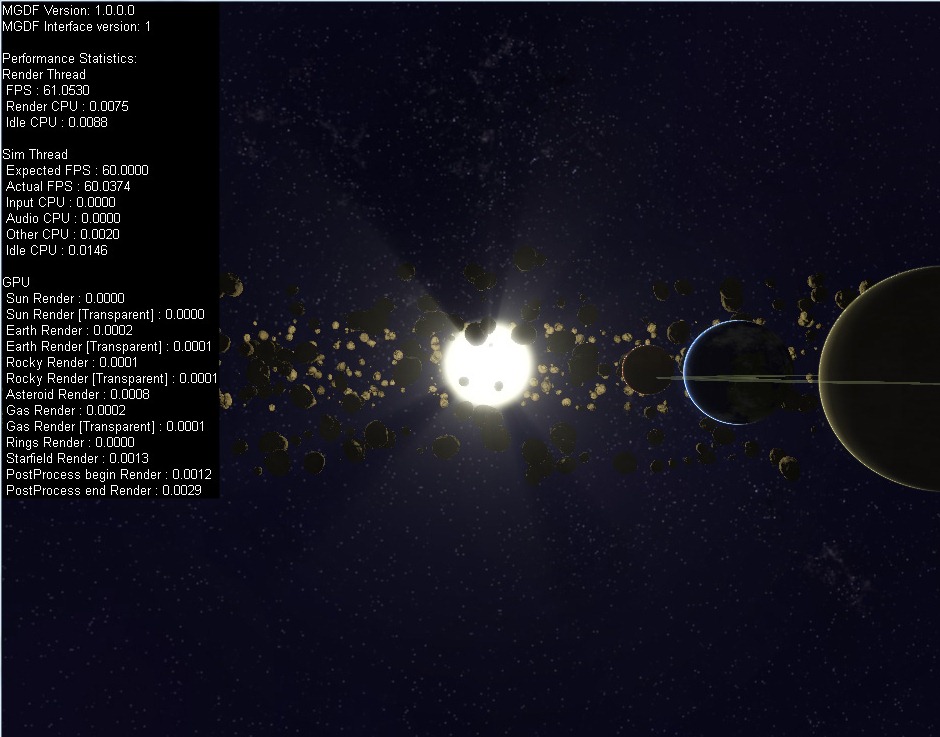
No point sprites – Use instancing or geometry shaders

In Junkship I used the DX9 point sprites feature to render the background starfield, in DX11 the point sprites feature has been removed so to get the equivalent functionality you have two choices – Object instancing or geometry shaders. To get a point sprite effect using object instancing involves creating two vertex buffers – the first being a quad, the other being a matrix transform defining how to orient that quad for every sprite you wish to display. To render the sprites, you would then use a pixel shader which draws a texture over the quad, and using the ID3D11DeviceContext::DrawIndexedInstanced method will ensure that the sprite will be drawn for every orientation specified in the second vertex buffer. The other option (the one I chose) was to use a Geometry shader. Geometry shaders are a relatively new type of shader (introduced in DX10) which allow the GPU to generate new vertices in addition to those supplied via the usual vertex buffers. To render billboard style point sprites (sprites that always face the camera) you will need to supply all the positions of the point sprites in a vertex buffer, then in a geometry shader create 4 vertices about this position that exist on a plane that the position->camera vector is normal to (the HLSL code for this is shown below) Once this is done you should be able to use the same pixel shader as used by the instanced object technique.

[maxvertexcount(4)] // point sprite quad, so 4 vertices

void main(point Starfield_VSOutput input[1],inout TriangleStream<Starfield_GSOutput> stream)
{
    float3 right;
    float3 up;

    if (abs(input[0].LocalPosition.y) < 0.5)
    {
        right = cross(UP,input[0].LocalPosition);
        up = cross(input[0].LocalPosition,right);
    }
    else
    {
        //calculate the positions using absolute right instead
        //of absolute UP when the position is near the north/south
        //poles to avoid errors in the cross product with near
        //parallel vectors
        up = cross(input[0].LocalPosition,RIGHT);
        right = cross(input[0].LocalPosition,up * -1);
    }

    up = normalize(up);
    right = normalize(right);

    float intensity =  saturate(1.0 - length(input[0].LocalPosition));
    float scale =  MinScale + (intensity * (MaxScale - MinScale));
    float3 v1 = input[0].LocalPosition    + (right * scale) - (up * scale);
    float3 v2 = input[0].LocalPosition  + (right * scale) + (up * scale);
    float3 v3 = input[0].LocalPosition    - (right * scale) - (up * scale);
    float3 v4 = input[0].LocalPosition    - (right * scale) + (up * scale);

    Starfield_GSOutput output;
    output.UV = float2(1.0,1.0);
    output.Intensity = intensity;
    output.LocalPosition = input[0].LocalPosition;
    output.Position = mul(float4(v1,1.0),WorldViewProjection);
    stream.Append(output);

    output.UV = float2(1.0,0.0);
    output.Intensity = intensity;
    output.LocalPosition = input[0].LocalPosition;
    output.Position = mul(float4(v2,1.0),WorldViewProjection);
    stream.Append(output);

    output.UV = float2(0.0,1.0);
    output.Intensity = intensity;
    output.LocalPosition = input[0].LocalPosition;
    output.Position = mul(float4(v3,1.0),WorldViewProjection);
    stream.Append(output);

    output.UV = float2(0.0,0.0);
    output.Intensity = intensity;
    output.LocalPosition = input[0].LocalPosition;    
    output.Position = mul(float4(v4,1.0),WorldViewProjection);
    stream.Append(output);
}

Direct2D/DirectWrite doesn’t work with DX11

some reason Microsoft decided not to add support in Windows 7 for Directwrite/Direct2d access to DX11 surfaces (apparently this is remedied in Windows 8), which means that to render text one either has to rely on sprite fonts or (warning WTF approaching) create a DX10.1 device that uses DirectWrite + Direct2D to render text to a shared backbuffer with DX11. Instead of dealing with this mess I used the FW1FontWrapper library, which has met my needs thus far.

Ditch DirectInput (If you haven’t already)

I have been dragging my heels on this for a number of years as I know the use of DirectInput is deprecated and not recommended, so I finally bit the bullet and switched to using RawInput. Despite the (horrendously bad) documentation on how to use it, it actually proved to be considerably simpler than the DirectInput code that it replaced. One thing to note with RawInput is that if you want responsive input you have to ensure that your main window thread processes messages quickly and doesn’t experience any delays. For this reason I moved all rendering into a separate thread (the game simulation was already) as I didn’t want the input latency to be tied to the rendering frame rate. So now the window thread is now only handling input and windows API messages, and rendering and game simulation are run on two separate threads. (see here for how I set up the sim/rendering/input threads in the MGDF framework that Junkship runs on)

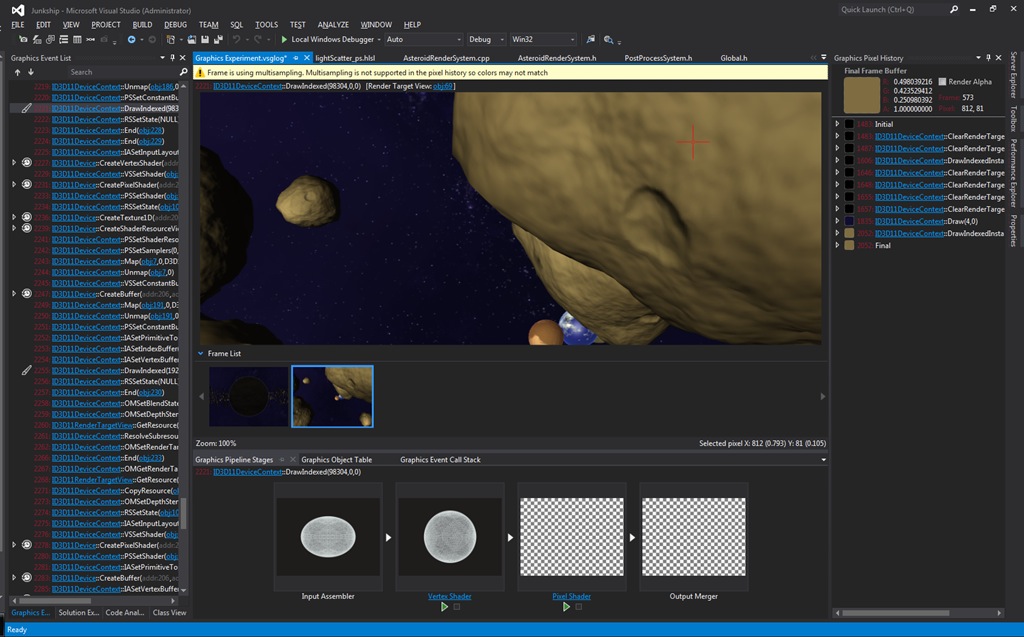
Visual studio 2012 Graphical debugging is great

I also upgraded to Visual Studio 2012, which has a great new feature for debugging DirectX applications. Its pretty much the old PIX tool that we all know and love that has been given a serious facelift (PIX was great functionally, but the UI was truly horrible) and integrated into Visual Studio. For me this is a killer feature over VS2010 (Once you get over the ALL CAPS MENUS which everyone seems to be enraged about – Its kind of weird but doesn’t really annoy me to be honest)

image

So now Junkship is fully ported (and leaner and faster than ever) I can get back to doing the fun stuff again Smile

Timing is everything

Posted on Jul 3, 2012 graphics programming

02-07-2012

According to Donald Knuth

We should forget about small efficiencies, say about 97% of the time: premature optimization is the root of all evil

Now this seems like sage wisdom, and its wisdom I agree with, however in practice I’ve found that if you begin a project without thinking at all about the performance considerations of your design decisions, you’ll come to regret it later. After you get annoyed at how slow things are, you’ll decide to do some optimizin’ and you get a couple of low hanging fruit out of the way but then quickly find that there are no more hot-spots left, but the program still performs horribly because of numerous small architectural problems. So how does one reconcile getting the important things done and not getting bogged down by excessive optimization, but also ensure that your program isn’t carrying the weight of accumulated poor decisions?

Now I’m not going to claim any silver bullets here – but for me the key is to build in good instrumentation and profiling information early on, so that the performance impact of each new feature is immediately apparent. This ensures that you can control bloat as it appears, but also means that you can plow on ahead with new features if the profiling shows no performance red flags. Now profiling CPU time is a relatively trivial thing, you can use the QueryPerformanceFrequency (warning this blog post is going to be windows and DirectX centric) function to get the frequency of the high resolution timer, then take timing samples using QueryPerformanceCounter, and finally divide the sample differences by the frequency and voila! accurate profiling information!

Unfortunately though in this day and age, most games are GPU - rather than CPU - bound and the previous timing method will not give you any useful information as to what’s eating your GPU’s cycles. The reason for this is that the GPU runs in parallel to the CPU, (usually a frame or two behind the CPU) so most DirectX API calls are largely non-blocking on the CPU side of things; they just queue up commands which the GPU will execute later. This means that if you sample the CPU time before and after Direct3D API calls, all you are measuring is the direct CPU cost of the call, not the time that the GPU will use executing those commands at some point in the future.

Luckily DirectX does have a means of measuring the time taken on the GPU side of things, but due to the asynchronous nature of the GPU, it can be a bit tricky to work with. In DirectX 9 (Dx10 & 11 are largely the same) it’s a 3 step process, firstly we create some Query objects, we then issue the queries either side of the API calls we want to profile, then at some point in the future we ask for the result of those queries when they become available. The last part is the trickiest, as we don’t want to stall the CPU waiting for the GPU to give us the result of our queries, we want to buffer the responses so that we’ll only try to get the results after we’re pretty sure that they are ready (i.e. a few frames in the future). This does mean that the profiling information for the GPU is going to lag behind by a few frames, but in practice this isn’t a big issue. The important bits of code are as follows

//determine if the queries we need for timing are supported

HRESULT tsHr = device->CreateQuery(D3DQUERYTYPE_TIMESTAMP, NULL);
HRESULT tsdHr = device->CreateQuery(D3DQUERYTYPE_TIMESTAMPDISJOINT, NULL);
HRESULT tsfHr = device->CreateQuery(D3DQUERYTYPE_TIMESTAMPFREQ, NULL);
if (tsHr || tsdHr || tsfHr)
{
    //oh no, the timing queries we wan't aren't supported BAIL OUT!

}

//The disjoint query is used to notify whether the frequency

//changed during the sampling interval. If this is the case 

//Then we'll have to throw out our measurements for that interval

IDirect3DQuery9* disjointQuery;
device->CreateQuery(D3DQUERYTYPE_TIMESTAMPDISJOINT, &disjointQuery);

//This query will get us the tick frequency of the GPU, we will use

//this to convert our timing samples into seconds.

IDirect3DQuery9* frequencyQuery;
device->CreateQuery(D3DQUERYTYPE_TIMESTAMPFREQ, &frequencyQuery);

//these two queries will record the beginning and end times of our

//sampling interval


IDirect3DQuery9* t1Query;

device->CreateQuery(D3DQUERYTYPE_TIMESTAMP, &t1Query);

IDirect3DQuery9* t2Query;
device->CreateQuery(D3DQUERYTYPE_TIMESTAMP, &t2Query);

...

//before we start rendering

disjointQuery->Issue(D3DISSUE_BEGIN);
frequencyQuery->Issue(D3DISSUE_END);
t1->Issue(D3DISSUE_END);

//RENDER THE FRAME

t2->Issue(D3DISSUE_END);
disjointQuery->Issue(D3DISSUE_END);

...

//a few frames later, lets try and get the result of the query

BOOL disjoint;
if (disjointQuery->GetData(&disjoint,sizeof(BOOL),0) == S_OK)
{
    //if the timing interval was not disjoint then the measurements

    //are valid

    if (!disjoint)
    {
        UINT64 frequency;
        if (frequencyQuery->GetData(&frequency,sizeof(UINT64),0) == S_OK)
        {
            UINT64 timeStampBegin;
            if (t1->GetData(&timeStampBegin,sizeof(UINT64),0) != S_OK)
            {
                return;//not ready yet

            }   

            UINT64 timeStampEnd;
            if (t2->GetData(&timeStampEnd,sizeof(UINT64),0) != S_OK)
            {
                return;//not ready yet

            }

            UINT64 diff = timeStampEnd - timeStampBegin;
            //The final timing value in seconds.

            double value = ((double)diff/frequency);
        }
    }
}   

Another important point to note is that these query objects MUST be released whenever the D3D device is lost/reset. I haven’t included code for doing this or ensuring that the commands are buffered correctly, however if you want a complete working example check out the Timer class in the MGDF framework that powers junkship.

Beachballs in space

Posted on Jun 25, 2012 graphics proceduralcontent

Heres a quick post on how I elaborated on a technique I first saw used by Paul Whigham to simulate whirling vortices on gas planets. I wont go into huge depth explaining the technique as he has already done a great job of doing so, but essentially the technique involves creating a number of cones which protrude from the center of a sphere outward. Each of these cones represents a conical surface detail. One then renders a voronoi diagram on the surface of the sphere mapping out for each pixel which cone is closest and encoding this into the textures RGBA data (as shown below).

image

Once this map is rendered, when rendering the object in the pixel shader one can then determine the strength of the nearest cone by sampling the voronoi map texture, and use this to offset the texture lookup to produce a whirl effect.

image

Whigham doesn’t go into detail as to how to calculate this offset, so in the interest of helping others out, here’s the relevant pieces of HLSL that I came up with.

//rotates a vector about an arbitrary axis

float3 RotateAboutAxis(in float3 v,in float angle,in float3 axis)
{
    //http://en.wikipedia.org/wiki/Rodrigues%27_rotation_formula
    return (v * cos(angle)) + (cross(axis,v)*sin(angle)) + (axis * dot(axis,v)*(1-cos(angle)));
}

...

//sample the voronoi map in object space
float4 vornoiSample = texCUBE(vornoiSampler,input.LocalPosition);

//decode the properties from the voronoi map
float radius = vornoiSample.a;
float3 whirlPosition = vornoiSample * 2 - 1.0;
float strength = abs(whirlPosition.z);

//recreate the z value for the cone axis
whirlPosition.z = sqrt(1.0f - whirlPosition.y*whirlPosition.y - whirlPosition.x*whirlPosition.x) * sign(whirlPosition.z);

//find the distance between the current pixel and the intersection point of the cone axis and sphere    
float3 difference = whirlPosition-input.LocalPosition;
float distance = length(difference);

//calculate the strength of the rotation at the given distance from the cone axis.
//the strength diminishes by distance squared from the axis outward
float attenuation = saturate(1.0 - (distance/radius));
float theta = (strength * MAX_ROTATION) * (attenuation * attenuation);

input.Normal = normalize(input.Normal);
//adjust the final cubemap texture lookup by rotating the lookup by theta about the cones axis.

float3 adjustedPosition = whirlPosition - (theta>0 ? RotateAboutAxis(difference,theta,whirlPosition) : difference);

I also found that this technique can be used for any roughly circular surface details. One such is case is generating impact craters on the surface of rocky planets. The general process is the same, except that instead of rotating texture lookups, one uses the voronoi map to adjust the heightmap data to produce circular surface indentations.

image

There are a bunch of other uses I can see this technique being useful for such as adjusting the strength of night time lightmaps on planetary surfaces to create cities, or varying diffuse colors on procedural planetary textures to create ‘biome’ type effects.

Constants are changing

Posted on Jun 25, 2012 design storytelling

As you may have noticed, I finally got around to updating the site to reflect the new aims for the Junkship project. Junkship is no longer an attempt to create a hybrid JRPG space opera game. While these types of games will always remain dear to me, they do so in a mostly nostalgic sense as I have found my tastes and interests moving away from these types of games for a number of years now. I think most of the problems I now have with heavily linear ‘cinematic’ experiences can be summed up by this quote from the suspicious developments manifesto

You can make a movie where people have to press the right buttons to see the next scene, but it’s hard, expensive, and spectacularly missing the point. These things count as ‘games’ in the same way that a wheel on a stick once counted as a ‘toy’, and we’ll look back on them with same tragicomic pity.

Maybe I’m just harder to impress these days, but ‘Epic’ storylines and cool cut scenes just don’t do it for me like they did when I was a teenager. Instead these days I’m floored by games that put you inside amazing dynamic worlds and don’t try too hard to tell you a story, instead they allow you to uncover the story as you interact with the world. So in keeping with this Junkship is now about putting you in the shoes of a freelance interplanetary arms dealer in a large procedurally generated solar system full of various planets, asteroids and rival political factions. The arms dealer aspect of it makes it interesting to me for two reasons, first – unlike most space trader type games you’re not a pirate, the goal of the game isn’t to purchase the best ship and fly about blowing people up. Instead you’re the guy designing, testing, and building the weapons, and choosing which pirates you want to sell them to. For me this emphasis on creativity and ingenuity is more compelling than a combat based treadmill to buy better and better stuff so you can blow up more stuff. Think more Tony Stark, and less doom guy.

image

he second reason is that being an arms dealer brings with it all sorts of interesting moral conundrums. When you are a space pirate, you don’t have much choice in your actions – its kill or be killed. An arms dealer however is in a completely different situation; who you sell your weapons to and why is a personal decision that reflects who you are and what you believe in. It also provides an interesting dilemma in that something you enjoy doing generates misery for many people, so how do you go about justifying those actions?

Obviously things are in the very early stages at the moment, and exactly how I’m going to execute on this vision is still very much unknown. With that said, I’ve largely completed the initial prototyping for the procedural solar system generation, so now its on to designing the weapon design workbench. downloads box2d

Asteroid blues

Posted on Jun 17, 2012 graphics proceduralcontent

Its been a while since the last blog post, however it doesn’t mean that nothing has been happening - quite the opposite, the amount of ongoing work has left no time to keep the blog up to date. I really should try and keep the posts coming on a regular basis or I find myself in my current situation with a massive backlog of things to write up, to help with this I’ve started to use trello to keep my work organized – so we’ll have to see how that works out .

So anyway, as promised here’s a dev diary on generating and rendering procedural asteroid fields. The basic idea for this was to use similar techniques I’ve used in the past to generate planetary textures using perlin noise to generate color and normal maps, but instead of applying it to a sphere applying it to some arbitrary (or seemingly arbitrary) geometry.

In my case I decided to use a sphere as the base for the asteroids geometry as opposed to using some combination of 3d noise and marching cubes. The reasons for this were twofold, firstly the sphere based approach was much simpler, and secondly most asteroids are vaguely spherical in shape anyway. Given a sphere its a relatively simple matter to use a 3d perlin noise function to move the spheres vertices up or down their normals in order to generate smooth deformations in the sphere surface.

I ran into some initial problems with this approach however as I was using the built in D3DXSphere primitive which uses a series of triangle strips to build a sphere. The problem with this is that the vertices are not evenly distributed as the smaller strips near the poles have much higher density than those near the equator, this leads to the areas near the poles appearing ‘crinkled’. The solution is to use an icosphere which is generated by continually subdividing an icosahedron to approximate a sphere. An icosphere has an even distribution of vertices which fixes the issue.

image

On the left, an icosphere – On the right, a sphere built up using strips.

image

An initial render of the asteroid geometry using the skin from an earthlike planet.

Rendering a single asteroid is one thing, but in order to create a convincing asteroid FIELD, its necessary to render hundreds or thousands of asteroids. In order to make this performant I utilized hardware instancing to re-use the same asteroid object, but to apply thousands of different rotation/scale/translation matrices in order to give the appearance of many different asteroids without the overheads of having thousands of unique textures and models. In practice I could use a handful of models and textures rather than just one to increase the variety a bit, but even as is the results are pretty good.

image

image